


 EN
 ไทย


Customers Also Purchased


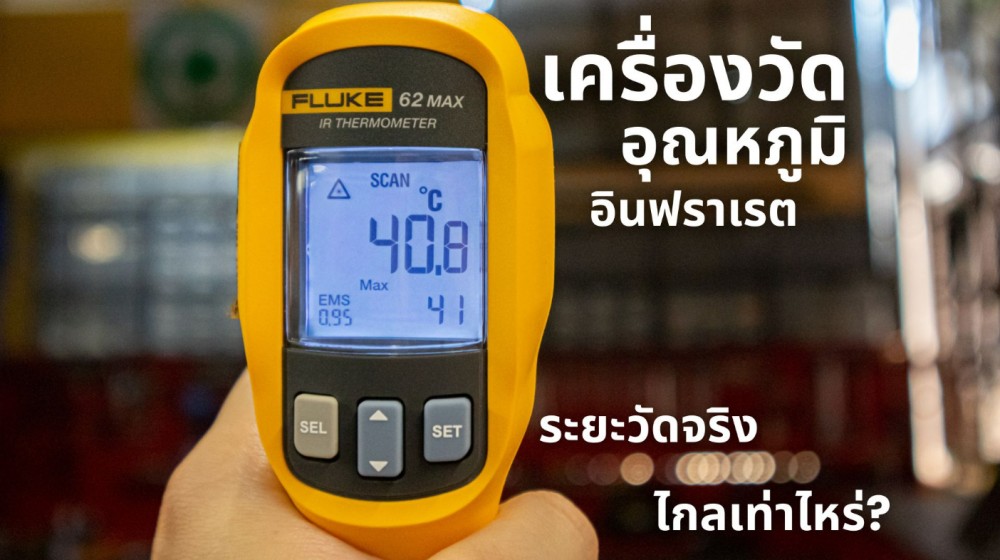
Many people who have used Moisture Meter have probably wondered about this quite a bit, right? You pick up an infrared (IR) thermometer, aim it at a distant spot you want to measure, and the numbers pop up—making it seem like it "can measure from very far away." At this point, we might think we can measure any long distance as long as we aim correctly. But just how far is it really? In real-world applications with high-heat tasks—measuring furnaces, motors, steam pipes, or inspecting electrical panels—you often find that the reading fluctuates, sometimes varying by ten degrees or more even when aimed at the exact same spot.
In this article, we will dive deep to help you make practical choices, showing that the "measuring distance" of a thermometer isn't just about physical distance; it depends on multiple variables. This is also why manufacturers rarely specify measuring distance simply as "how many meters." Understanding this will help you choose the right thermometer, use it properly for the job, and stop wasting time debating unreliable numbers.
What does a thermometer's measuring distance depend on?
Infrared (IR) thermometers measure temperature by "detecting thermal radiation" rather than through direct contact like thermocouples or probes. That's why it appears capable of measuring from far away: as long as the device can "see" the object, it captures the infrared energy and calculates the temperature.
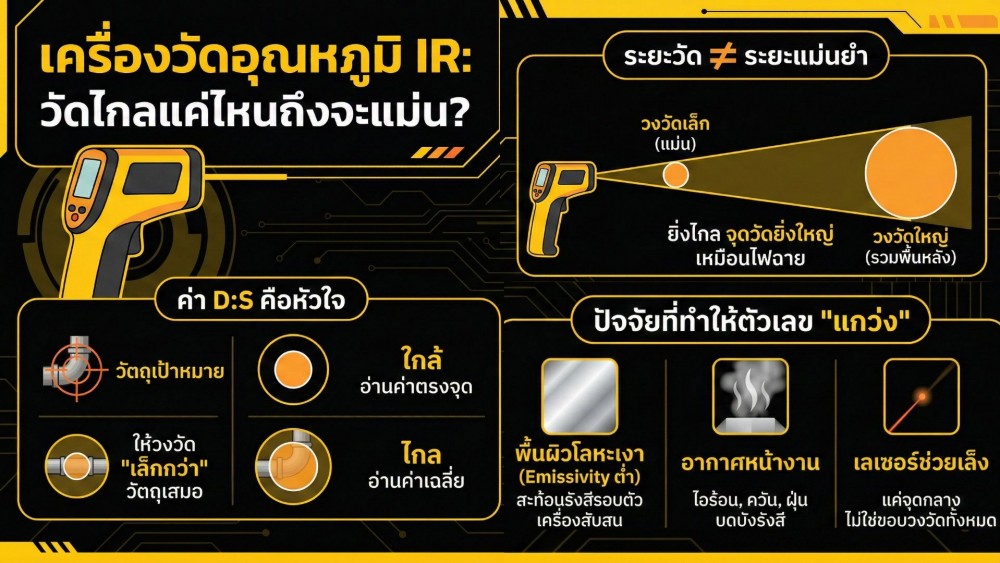
However, that's not the whole story. As we "step back," the actual area where the device captures radiation isn't always equal to that small red laser dot. The further back you go, the wider this measurement spot becomes—just like shining a flashlight on a wall where the light beam expands with distance. A small object you want the thermometer to measure might end up being just a small fraction of that circle. In the end, the device may measure a blend of the background, the surrounding hot air, and neighboring surfaces that have different temperatures.
Therefore, when it comes to thermometers, "measuring from far away" and "measuring accurately" are two entirely different things.
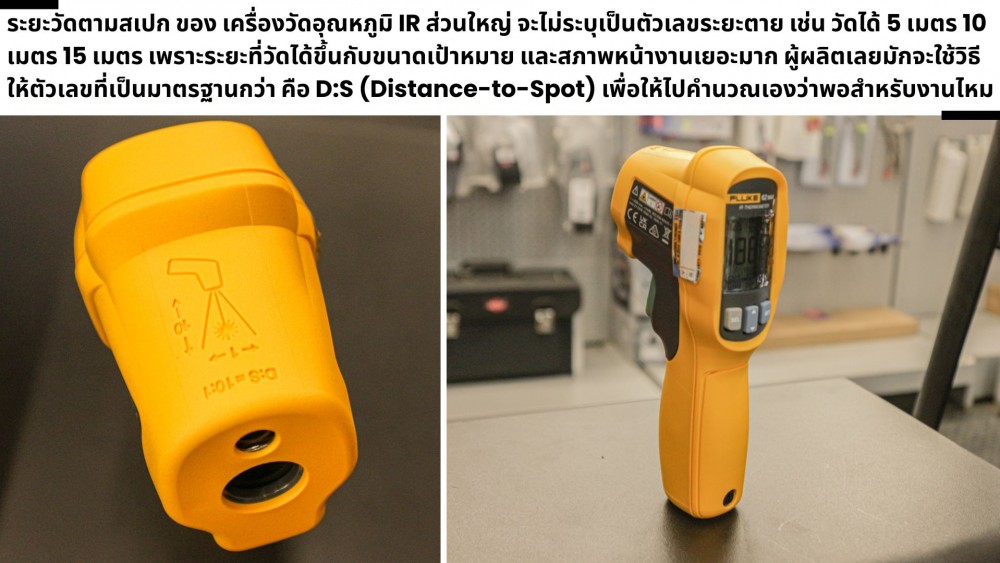
So when you check the specifications and don't see "measures up to how many meters," don't assume the thermometer lacks information. It is actually provided, but in the form of a D:S ratio—which is a much more practical metric because it systematically describes the relationship between the "distance" and the "measurement spot size" that expands with distance.
The D:S ratio indicates "how far away" a thermometer can measure.
"Measuring from far away" really means: from how far away can you measure an object of this size, without the measurement spot exceeding the object's boundaries?
Here is an example: to measure a 2-inch pipe (approx. 50 mm in diameter), the measurement spot must be smaller than the pipe, say 25 mm, to ensure you are actually measuring the pipe and not the background. Now, if the instrument has a 12:1 ratio, at a distance of 12 × 25 = 300 mm (or 0.3 meters), the spot size is about 25 mm. This means to "confidently measure a 2-inch pipe," you can only stand about 30 cm away.
Do you see the picture? Even though instinctively we can aim from 2–3 meters away and still get a reading, to be confident that the thermometer is truly measuring the pipe and not the surrounding air, you might need to get much closer.
If the object is a large surface—such as a furnace wall, large tank surface, or large steel plate—a slightly larger measurement spot is fine. But if the object is small with a background at a different temperature, keep the measurement spot within 1/2 of the object's size. And for precision applications, such as electrical terminals in panels, contactors, or busbars, keeping the spot size to about 1/3 of the target size provides greater peace of mind.
Why leave a margin? Because the actual spot size of an IR thermometer is sometimes not a sharp, well-defined circle, and on some models, the "effective spot size" is larger than you think—especially if the lens is dirty or you are aiming at an angle.
Is the visible "laser pointer" the actual measurement spot?
Many people see a single red laser dot and assume the thermometer is "measuring right there." But in reality, the laser is only there to help you aim; it does not indicate the full boundary of the measurement spot.
Some thermometer models feature multiple laser points to outline the approximate boundaries of the measurement spot. Others feature a circular laser that helps you visualize "the measurement circle is roughly this size," which is very helpful when working at a distance or on small targets. Alternatively, thermal cameras display temperature ranges using colors instead of lasers. How do thermometers and thermal imaging cameras differ? Which one is right for you?
Does the surface affect readings? Why do thermometers require attention to Emissivity?
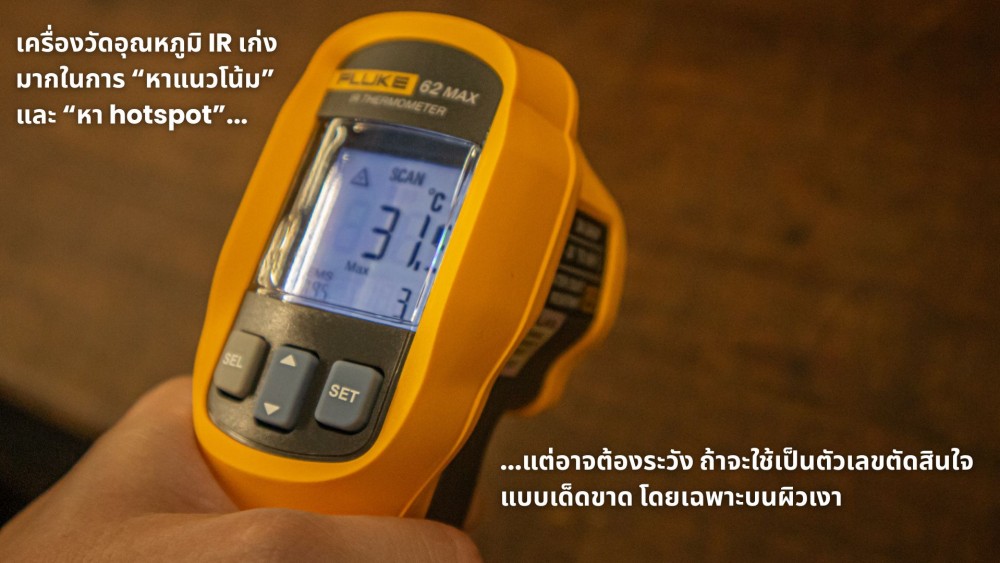
If there is one thing that leads many people to think an IR thermometer is inaccurate, it is "shiny metals." When aiming at polished stainless steel, shiny aluminum, or new stainless steel pipes, the measured reading may be far lower than the actual temperature.
The reason is that an IR thermometer does not read color or visual appearance; it reads the surface's "thermal radiation." Different surfaces emit radiation differently. The technical term is Emissivity or emissivity, which simply put is the rate of heat radiation. The shinier the surface, the lower the value, causing the instrument to be less accurate.
- Dark, matte surfaces have high emissivity, making them easy to read and stable.
- Shiny surfaces have low emissivity and reflect radiation from surrounding objects, easily confusing the device.
Therefore, if you ask "how far can it measure?", the question you should really ask is: What are you measuring? What kind of surface is it? Because an accurate distance on a matte furnace wall and an accurate distance on a shiny stainless steel pipe are worlds apart.
How to make a thermometer measure shiny metal closer to reality
However, for actual technician work, there are basic techniques used for a long time to make thermometers easier to read. The principle is essentially to "make the target surface matte" or "use a reference point with known emissivity."
Examples of commonly used approaches (depending on job suitability and safety):
- Measure in areas where the surface already has stains, oxidation, or a matte finish instead of measuring on a fresh, shiny surface.
- Find "repeat measurement points" with similar surfaces to compare trends, rather than relying on a single reading.
- If high accuracy is required, use a contact probe thermometer / thermocouple as a reference, and use an IR thermometer as a tool to scan for anomalies.
Does the intervening air affect the thermometer?
If you wonder why aiming an IR thermometer at a steam pipe or furnace opening results in jittery or fluctuating numbers even at the exact same spot, it is because the device must receive infrared energy through a "medium"—which is air. And in real work environments, air is not as clean and clear as in an air-conditioned room.
What makes long-distance measurement much more difficult includes heat haze, smoke, dust, water droplets, steam, glass, or certain types of plastics that cause the thermometer to read the "glass surface" instead of the object behind it.
Therefore, if you measure from a distance in conditions with hot vapor or haze, to put it realistically: The farther the distance, the higher the risk of unstable readings. And this is why for some jobs, you should get as close as safely possible, or switch to an entirely different type of thermometer.
How to choose a thermometer if you really "want to measure from a distance"?
If the requirement is that you must measure from a distance because you cannot get close—such as being behind a safety barrier, the spot being too hot to approach, or measuring on an un-stoppable production line—it is recommended to focus mainly on these 4 factors. They are the "deciding factors" in whether long-distance measurements from a thermometer will be reliable, not just whether a number appears on screen.
1. The D:S ratio of the thermometer must be high enough for the target size.
Don't just look at the numbers; always start with the "object size" first, such as measuring pipes, flanges, motor housings, or components in electrical panels. Then calculate backward to determine how small the spot needs to be to avoid capturing the background, and finally choose a D:S ratio sufficient for the actual distance you must stand.
How to use a thermometer to get accurate readings If you must stand 3 meters away but the workpiece is only a few centimeters wide, even if the device "reaches" it, there is a high chance it will read surrounding objects as well. Therefore, D:S is what gives the word "distance" practical meaning.
2. Thermometers with a sighting system that indicates spot boundaries
A thermometer with multi-point lasers or a circular laser isn't just for looks; it helps reduce errors when taking long-distance measurements, especially in tight spaces or on small objects. Even if you "hit" the target, if the spot boundary bleeds into the background, the reading will mislead you.
Think of a good sighting system as one that "lets us know the boundary being measured" rather than just showing where it points. The greater the distance, the more worthwhile it is to invest in proper targeting.
3. Adjustable Emissivity for handling various surfaces
If your work involves multiple types of metals—alternating between matte and glossy surfaces, or measuring painted steel, stainless steel, aluminum, down to rubber and plastic—a thermometer with adjustable emissivity will let you tune the device to match the surface much better than fixed-value models. It also helps reduce "long-distance measurement distortion," which often isn't distorted by distance, but rather by differences in surface reflection and radiation.
Simply put, models with adjustable emissivity allow us to "control risks" more effectively, especially when repeatedly measuring the same spot to find an average value.
4. Job-site durability
Which digital thermometer should technicians choose? Remember, technician work doesn't happen in a cleanroom. Lenses can get dirty, dust and fumes occur, tools get dropped, ambient heat can be high, and sometimes you need to take quick measurements with one hand. If a device is finicky, has a hard-to-read screen, or scratches easily, you'll start doubting the readings—no matter how great the specs look on paper.
Choosing a hassle-free tool (comfortable grip, clear display, responsive buttons, durable lens/body) makes long-distance measurements more "stable" in real life, and ultimately gives you the confidence to rely on the thermometer as a daily tool.
Summary: Do you need "precise numbers" or just a "rough idea"?
Let's conclude with this question, as it can completely change how you choose a thermometer.
If you just need to know: "Where is abnormally hot?" "Is this motor running hotter than usual?" "Is this terminal starting to have an issue?" An infrared or IR thermometer is a fast and cost-effective tool. Long-distance measurements also work well if you understand the spot size relative to distance, emissivity, and suitable environmental conditions.
Therefore, the answer to the question: "How far can an IR thermometer really measure?" isn't a single number, but an "on-site equation" that you control across several factors.
If the object is large, matte, and the background isn't deceptive, Moisture Meter measuring from a distance is much easier. But if the object is small, glossy, or has heat vapors or smoke, you should move closer or use a device with a higher D:S ratio,
and measure in a more systematic way.