


 EN
 ไทย


Customers Also Purchased



Imagine this: you are welding smoothly, and the weld bead that should have been neat suddenly has porosity or burn-through, even though you are using the same welder, the same settings, and the exact same technique as always. Where did the problem come from? Some blame the machine or even their own skills, but in reality, one of the crucial variables often overlooked is Welding Wire the welding rod itself.
Welding rods aren't just something you grab and use without a thought. Moisture levels, shelf life, flux condition, rod diameter, and workpiece compatibility all affect the weld bead. Furthermore, defective welding rods can cause an unstable arc, incomplete bead fill, porosity, or localized burn-through.
So, let's break down in an easy-to-understand way why problematic welding rods can cause weld beads to blow through into holes. We'll explore the causes—from moisture, damaged flux, improper rod size, to incorrect rod selection—as well as what you should check before blaming the welder, the current settings, or your own welding skills.
A welding rod is not just an ordinary metal stick
Many people might view stick welding electrodes simply as metal rods meant to deposit filler metal into a joint. But in reality, they consist of much more important components—especially flux-coated electrodes, where the core wire and outer coating work together during welding.
What makes an MMA welding electrode 'unusable'? How do you know you shouldn't weld with it anymore? Therefore, if the condition of the electrode changes, the quality of the welding process changes along with it—especially the flux, which is sensitive to moisture and physical impact. Potential problems include:
- Flux cracking, chipping, or flaking off results in incomplete shielding of the weld seam.
- The flux absorbs excessive moisture, generating gas and water vapor during welding.
- An unstable arc makes running the weld bead more difficult.
- The slag covers the weld seam poorly, increasing the risk of contamination.
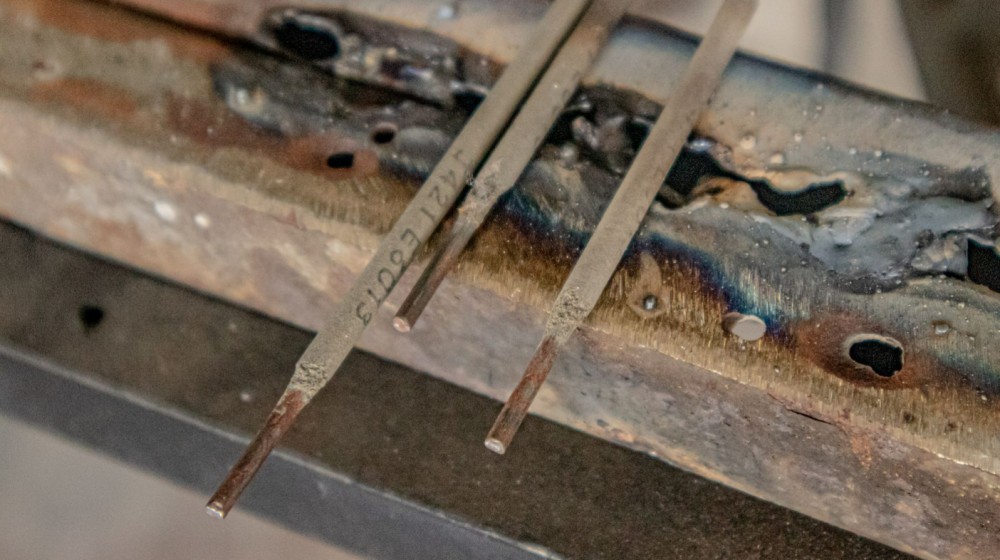
- Porosity occurs in the weld seam, appearing as tiny holes scattered on the surface or combining into voids.
Sometimes, we might assume burn-through happens because of a heavy hand, but the real root cause may start with the welding rod.
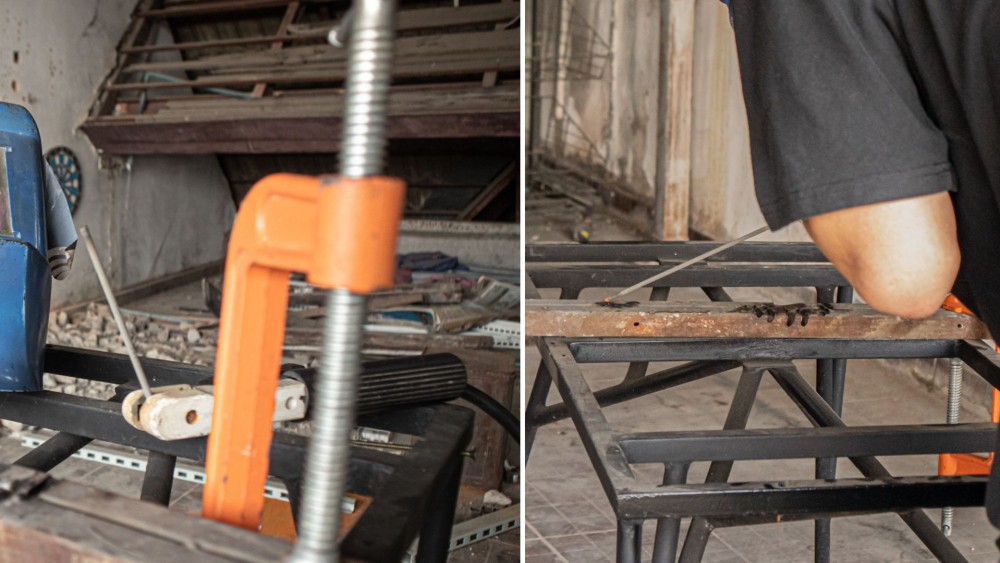
What causes burn-through holes in a weld seam?
Before blaming the welding rod, we must look at the overall picture: burn-through holes can stem from multiple causes, not just a single factor. For example, using too high a current that builds up more heat than the workpiece can handle, using an oversized rod on thin workpieces, traveling too slowly so the base metal melts excessively, or having rust, paint, oil, moisture, and dirt contaminating the workpiece surface.
When exposed to intense heat, these contaminants evaporate into gases, pushing through the weld puddle and causing porosity.
Why does a damp welding rod cause holes in the weld seam?
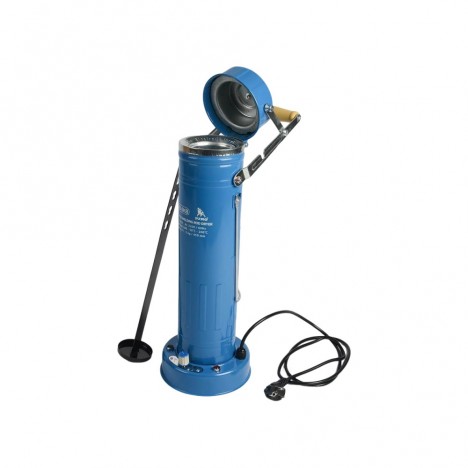
Damp or Wet Welding Electrodes: How to Fix Them? Is It Okay to Force Their Use? Moisture issues are very common in our region due to high rain and humidity. Opening a package and storing it in a damp place causes the flux coating around the rod to absorb moisture. During welding, this moisture turns into steam and gas, becoming trapped inside the molten weld pool.
As the weld metal cools rapidly, the gases that fail to escape in time become porosity on the surface or within the weld bead. If concentrated in one spot, especially on thin workpieces, this can blow out voids that look like burn-through holes.
Warning signs to watch out for include a rod that looks normal on the outside but exhibits an unstable arc when striking, a sputtering welding sound, excessive spatter, or tiny bubbles during the pass. In these cases, you should suspect the condition of the welding rod first.
Cracked, chipped, or peeling flux has a greater impact than you might think.
A welding rod with cracked or chipped flux should not be overlooked. The flux shields the weld pool, stabilizes the arc, and forms slag to cover the weld bead. If the flux coating is discontinuous, external air and moisture can easily contaminate the weld seam.
As a result, the weld is prone to porosity, a lack of fusion/density, or arc flare. Especially for rods that were dropped, bumped, or handled carelessly, fine hairline cracks can form in the flux, even if they look usable at a glance.
Choosing the wrong welding rod size can also cause burn-through on your workpiece.
A common mistake is using a large electrode on thin square tubing, thin sheet metal, or old workpieces thinned out by rust. Just moving slightly too slowly or pausing briefly at a point can cause burn-through. Therefore, a larger rod does not always mean better. For thin materials, use a smaller rod and adjust the current appropriately to make control much easier.
Mismatching the welding rod to the job type can also lead to weld seam issues.
Different types of welding rods are formulated differently. Some are suitable for general-purpose work, while others are engineered for structural work, piping, repair jobs, or specific welding positions. Choosing a welding rod that does not match the application can lead to insufficient penetration, difficulty controlling the puddle, slag inclusions, or porosity.
Problems often arise from using whatever electrodes are on hand without considering workpiece thickness, steel type, and required strength level, or What Do the Codes on Welding Electrodes Tell Us?
While you don't need to memorize every code, it's important to understand that welding electrodes are not universally interchangeable, and making the wrong choice can affect both bead appearance and the strength of the workpiece.
A Dirty Workpiece Combined with Problematic Electrodes Makes Porosity Even Worse
Sometimes the problem doesn't stem from the welding electrode alone, but from a combination of several factors—such as slightly damp electrodes, light rust, oil stains, or existing paint coatings on the workpiece. During welding, the high heat causes surface contaminants to vaporize into smoke, gas, and impurities that mix into the molten weld pool. When combined with electrodes whose flux isn't performing properly, the weld bead becomes even more prone to porosity.
Many might think welding steel doesn't require much surface preparation, assuming the electrode can burn off rust or paint to some extent. While that might suffice for certain basic jobs, surface preparation remains crucial if you need a solid, strong, and hole-free weld bead.
The weld area should be as free as possible from oil stains, paint, heavy rust, moisture, and dust, because the cleaner the workpiece, the more effectively the welding electrode performs.
The concerning issue is that when a weld bead has porosity caused by both the electrode and a dirty workpiece, we might only see the outer surface and think laying another pass over it will fix it. However, if porosity lies inside and isn't ground out first, overwelding merely conceals the problem temporarily without solving the weld's true structural weakness.
If you encounter an unusually porous weld bead, stop and investigate the cause first—whether it's due to the welding electrode, the welder, or other factors like technique—rather than rushing to cover it up with another weld pass.
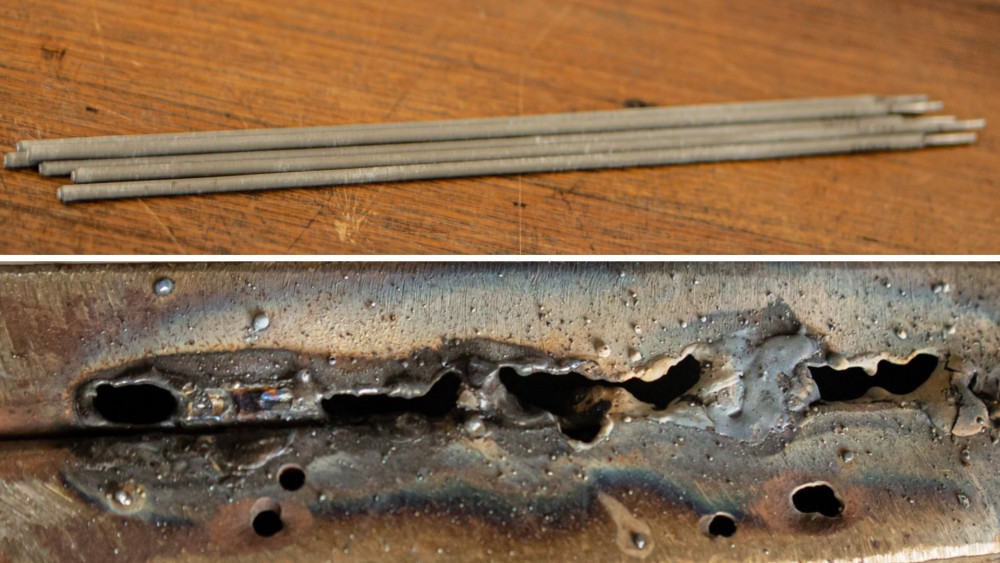
Signs That the Welding Electrode Might Be the Cause of the Problem
To determine whether porosity is caused by technique, the machine, or the welding electrode, observe its behavior while welding. A malfunctioning electrode usually shows warning signs right from the arc strike, such as: Unusually difficult arc ignition requiring repeated tapping, the arc extinguishing easily after striking, inconsistent welding sound, excessive spatter, small bubbles appearing during travel, or visible porosity scattered across the surface after chipping the slag.
Another warning sign to watch for is a distinct difference in results between different boxes of electrodes. For example, if an old box produces heavy porosity while a freshly opened box delivers a smooth, stable bead, it is highly likely that the condition of the electrodes is indeed the factor.
If a batch of electrodes repeatedly delivers poor results across various workpieces even after adjusting current and preparing surfaces, consider replacing the electrodes rather than forcing yourself to keep using them.
Remember, a poor weld bead doesn't always mean you're at fault. Skill definitely matters, but welding electrodes play an equally significant role. If electrodes are damp, have cracked flux, are the wrong size, or are the wrong type, the work will turn out flawed no matter how well you try to lay the bead. Knowing how to spot electrode issues is just as important a skill as keeping a steady hand.
If the Weld Burns Through, What Should You Check First?
When a weld bead burns through with holes, don't immediately conclude that it's due to an unsteady hand. Start by checking things systematically. First, verify whether the workpiece thickness matches the welding electrode size—using large electrodes and high current on thin workpieces naturally creates a high risk of burn-through. Next, inspect the condition of the electrodes: check if they are damp, have cracked flux, or have been stored for too long. Then check if the workpiece surface is clean enough, free from residual paint, rust, oil, or moisture.
After that, move on to checking the current, travel speed, arc length, and electrode angle—all of which also affect heat buildup.
Additionally, if you weld too slowly or dwell on one spot for too long, thin workpieces can also burn through even if the welding rod is good. But if you have checked and found that everything seems reasonably appropriate yet the problem keeps recurring with the same batch of rods, trying a new batch of welding rods is a very easy and straightforward test.
Good Welding Rods Make Welding Work Easier
Welding rods in good condition that suit the workpiece and are selected in the correct size will make welding noticeably easier to control. This is because they reduce issues during welding, allowing you to focus on your travel, rod angle, and speed.
- Easier arc striking, no need to tap repeatedly
- A more stable arc, allowing more continuous travel
- Easier-to-control weld pool without erratic flow
- Better slag coverage over the weld bead
- Greater chance of a solid weld bead and less porosity
On the other hand, using problematic welding rods will only cause more confusion because you won't know whether the stumbling arc, porosity, or incomplete weld is caused by yourself or the rod. In the end, welding might feel excessively difficult, even though sometimes simply changing to a welding rod suited for the job and storing it properly makes the welding work much easier.
Good welding rods help reduce on-site working time, provide more consistent weld beads, and rod consistency noticeably affects both speed and work quality.
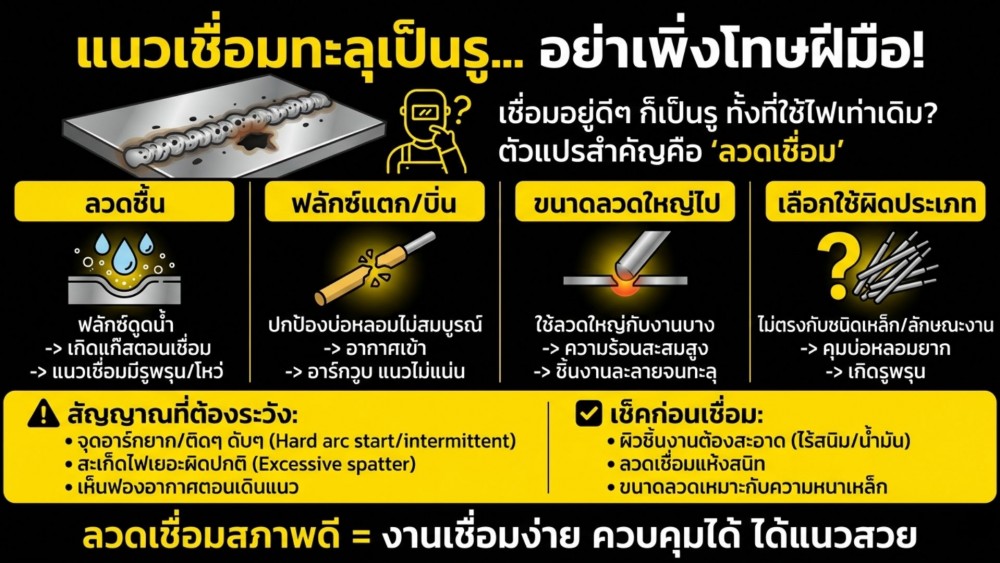
Summary: Don't Just Blame Your Skills for Holes in the Weld
A burned-through weld shouldn't be quickly blamed on poor skills alone, because in actual welding, many factors are involved. Very importantly, it depends on the condition and suitability of the welding rod. Moist rods, cracked flux, improper storage, incorrect size selection, or using the wrong type can all cause weld porosity, an unstable arc, incomplete welds, or burn-through holes just the same.
Remember that the welding rod is the starting point of weld quality, not just a consumable where you can pick up anything interchangeably. Before starting work, check the rod's condition, choose a size that matches the workpiece, store rods away from moisture, and do not force the use of abnormal rods on critical jobs.
When a hole occurs in a weld bead, troubleshoot systematically. Don't rush to blame the welder alone, because sometimes the root cause of the defective work may already lie in the Welding Wire even before you strike an arc.