


 EN
 ไทย


Customers Also Purchased




Why choosing Sandpaper seems easy, but in actual use doesn't turn out as expected? The same grit gives different surface finishes; one brand cuts deeply, while another slips with barely any material removal. Sometimes this ruins the workpiece without realizing that the wrong sandpaper was chosen from the start. These issues lead to an important question: How much do the numbers on a sandpaper label really tell us?
In this article, I'd like to invite everyone to explore sandpaper grit systems used worldwide, along with methods professional craftsmen use—which may be more accurate than relying solely on numbers—helping you understand why sandpapers with the same grit number can yield completely different results.
Common Sandpaper Grit Systems That Still Confuse Many
Before diving into numbers and various standards, I invite you to see the bigger picture first. Why did grit numbering systems come about? And why are there so many different types causing confusion today?
Looking back, "sandpaper grits" were not introduced simply to make selection easy for users; they were created so manufacturers could control abrasive grain consistency for industrial applications. Thus, the systems were designed with factory logic rather than user perspective. As the world embraced a wider variety of tasks, the numbers that once sufficed could no longer fully describe the sanding tactile feel.
All of this is why we must clearly understand the various grit systems before comparing the actual coarseness of sandpaper.
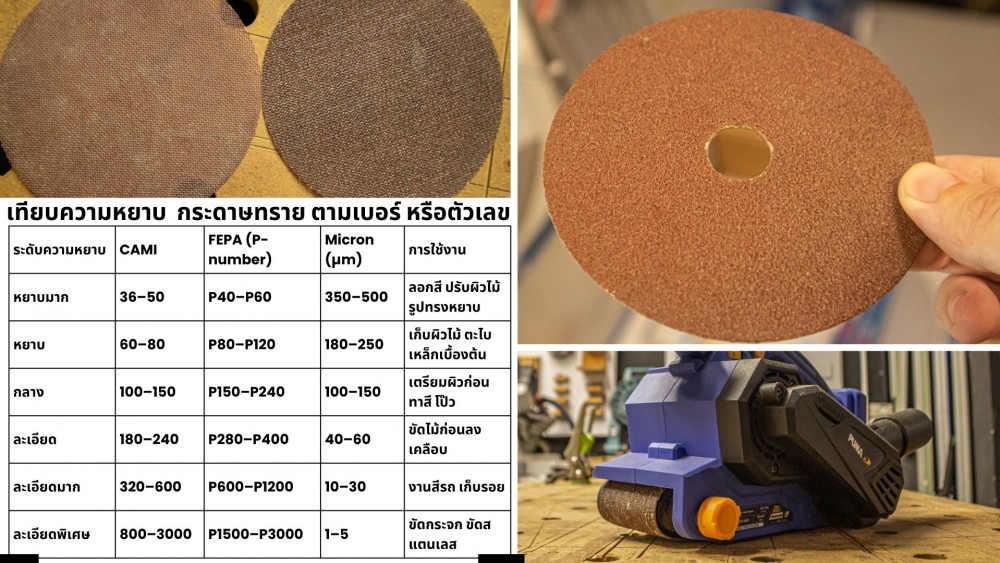
CAMI System (US): Familiar numbers like 40, 80, 120, 240
This is the most straightforward numbering system, ideal for general woodwork and metalwork. However, its grit uniformity is less consistent, and higher numbers may not be as fine as the number suggests. For example, many Makita series produced for general carpenters, metalworkers, and the construction market utilize the CAMI system.
FEPA or P-number system (Europe)
Prefixed with a "P", such as P80 or P240, it offers greater precision and is very popular in furniture and automotive paint work. The numbers can be somewhat confusing because they do not match the CAMI system. This FEPA system is mostly found in leading European brands such as Bosch, Festool, or Klingspor.
Micron system (µm)
Used in ultra-fine work such as polishing stainless steel or glass. These numbers indicate the actual grain size: for example, 30 µm is roughly equivalent to P800–P1000, 5 µm is about P3000, and 1 µm, which is the finest type, is used to achieve a mirror-smooth finish.
Why is the number on sandpaper not the whole answer?
Think about it simply: if sandpapers of the same grit number were truly equal in roughness, why do they feel different when you touch them? Why do some grits bite deeper than expected, while others barely remove any material at all? Or why do some fine grits still leave visible scratch patterns?
The answer is that the number on the sandpaper is only one part of its overall properties; it doesn't tell you the real reason behind how it will actually perform. And this is another popular misconception about sandpaper that you should stop believing.
There are many things that the number cannot tell you, such as:
- The actual sharpness of the abrasive grains
- The type of abrasive grain material, such as Aluminum Oxide, Silicon Carbide, or Zirconia
- The distribution density of the abrasive grains
- Abrasive coating (Open coat / Closed coat)
- Type of backing material, such as heavy paper, film, or cloth
- Grain bonding technology, such as Resin bond or Glue bond
- Anti-clogging / heat-resistant coatings, which affect the smoothness of the sanding process
All of these factors mean that 120-grit from two different brands, or "P400 compared to #400 from another system," can yield very different results. Once you understand this, it won't surprise you why professionals often pick it up to feel the texture, inspect the surface, listen to the sound, and test it before making their final choice.
Can the feel of sandpaper be more accurate than the number?
The tactile feel is a much more nuanced indicator than the sandpaper grit number. It tells you far more than just "coarse" or "fine", conveying micron-level differences in how sharp the grains are, how evenly they are distributed, and how the backing handles applied pressure.
The sensation from your fingertips acts like an inherently precise measuring tool. Even if something is invisible to the naked eye, touch reveals the truth with astonishing clarity.
What touch can tell you goes deeper than many think: whether it is the sharpness of the abrasive grains, the uniformity of their distribution, the hardness or softness of the backing, or the friction profile that reflects whether the sandpaper will create deep scratch patterns or just perform light surface finishing, as well as the material removal rate.
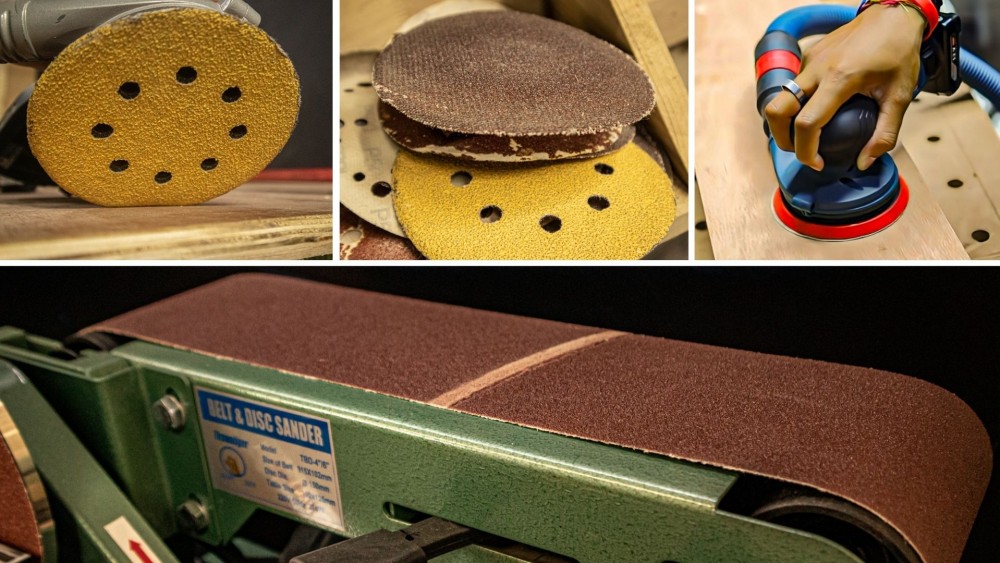
Besides Round, sheet, and belt sandpaper: How to tell when it shouldn't be used anymore? There is also the quality of the abrasive grains that may degrade over time, the anti-clogging coating that yields a distinct slickness when stroked, and the feedback under pressure indicating whether the sheet is easy to control, soft in hand, or overly stiff. Together, all of these form a tactile language that helps craftsmen gauge grit level and quality far more accurately than the numbers on a label.
Simple, real-world examples frequently seen in craftsman work that clearly highlight the difference:
- A P120 from one brand bites aggressively with noticeable hand vibration, while a P120 from another brand might feel as smooth as P220 because the sharpness of the grain coating differs.
- Wet #240 delivers a noticeably smoother finish than dry #240 because its backing and resin are designed to work with water, reducing grain breakdown.
- Sandpaper using silicon carbide grains feels "sharp, fine, cutting smoothly," unlike aluminum oxide which feels "coarser, harder, but more durable and resistant to heavy sanding pressure."
- High-quality sandpaper provides a steady, vibration-free feel even at coarse grits, unlike cheaper products that tend to shudder due to uneven abrasive grain distribution.
- Film-backed sandpaper feels smoother, slicker, and easier to control than standard paper even at the same grit, because the backing helps keep the abrasive grains at a uniform height.
Numbers never tell you any of this. But the touch, the sound, and the tactile feedback between you and the workpiece will always reveal the whole truth.
How to gauge sandpaper grit by touch like a pro
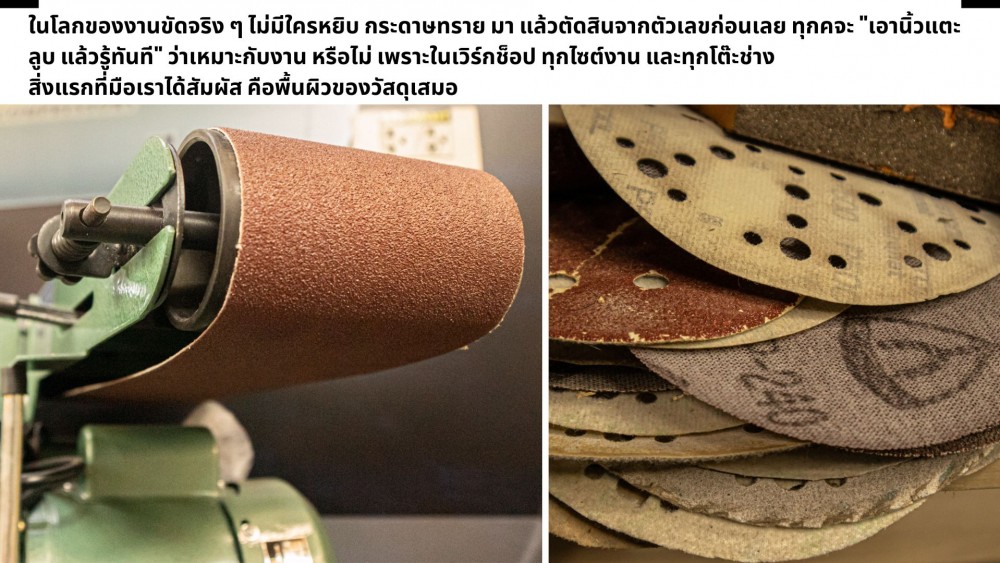
Whether you are a beginner or a professional, tactile intuition is often many times more accurate than the number printed on the sandpaper. Sometimes, a single stroke is all it takes to know whether the job will turn out well. Assessing by touch is a vital skill—not complicated, yet exceptionally powerful for identifying the grit level, grain quality, and task suitability before you even start sanding.
1. Stroke the sandpaper surface in a long line, don't just tap it lightly
A long stroke reveals whether the grains are evenly distributed, and allows your hand to sense the sharpness, spacing, and depth of the abrasive grains much more thoroughly than a brief, superficial tap.
Stroking in a long line will expose surface variations, such as shifting from coarse to smooth or gritty to slick, which is key to knowing whether that batch of sandpaper was genuinely well-manufactured. If you feel it catching unevenly at spots,
Common real-world examples:
- Cheap sandpaper gives a patchy, coarse feel because the grains are scattered unevenly.
- Good sandpaper delivers a consistent, smoothly graduated feel without snagging over a long stroke.
2. Listen to the sound of the sandpaper rubbing against the material
Sound is a great indicator of grit, as each roughness level produces a distinct sound when abrading. For example, a harsh scraping sound means the grains are sharp and bite deeply; a steady swishing sound indicates medium grit; and a soft, faint hiss signifies an ultra-fine grit where the cutting action is gentlest.
This technique is widely used in automotive paint and fine finishing work where quick grit verification is needed without wasting time test-sanding multiple spots. Many automotive refinishers rely on sound as a primary guide, as it is precise enough to determine which grit is suited for removing dust nibs or preparing surfaces prior to the final clear coat.
3. Press your finger lightly on the sandpaper to gauge resistance
Lightly pressing your finger on sandpaper allows you to gauge both sharpness and friction simultaneously. If it feels rough and resistant, it means the abrasive grains are sharp and cut aggressively, making it suitable for stripping surfaces or metalworking. If it feels slippery yet you still feel some grip, it indicates a medium to fine grit. However, if it glides smoothly with almost no friction at all, it is an ultra-fine sandpaper of grit 1000–3000 and above, designed for the finest finishing touches such as clear coats, automotive paint, and high-gloss finishes.
4. Try sanding scrap wood or metal for just 1 second
The dust pattern is the most accurate indicator of grit coarseness. Sanding for just 1 second reveals the pattern of the dust produced: coarse dust forms large, thick clumps, confirming a truly coarse grit, while extremely fine dust drifts lightly like smoke, indicating a fine grit.
Clear scratch lines indicate that the abrasive grains are very sharp and suitable for metalwork, whereas a patchy, rough pattern means the abrasive grains are unevenly distributed, causing inconsistent scratches. This dust-examination technique is very popular in woodworking and furniture making because it helps you choose sandpaper based on actual testing.
5. Fold the sandpaper to check the flexibility of the backing
Folding the sandpaper immediately reveals the type and quality of the backing, as the backing significantly affects the ability to conform to curved surfaces and control the work.
A stiff backing is suitable for metalworking requiring high cutting force, while a medium backing is ideal for woodworking that needs a balance between durability and smoothness. A flexible backing is best for curved surfaces, fine finishing, and automotive paintwork where easy surface control is required—especially film-backed sandpaper like P400, which delivers a smoother finish than standard paper and greatly minimizes scratch marks.
Conclusion
The sandpaper grit number acts as a compass, serving as the 'sanding framework' that helps minimize mistakes. Without grit numbers, work would be far more complicated, but your fingertips often tell a clearer truth than the number on the label.
Selecting the truly right sandpaper requires combining the grit number as a rough guideline with tactile feedback to verify real quality. Before making a decision, feel the texture and listen to the sound to see how the sandpaper surface responds, how sharp the grains are, whether it cuts fast, and whether it feels consistent or catches.
Checking this way reduces the risk of choosing the wrong grit, minimizes swirl marks, and finishes the job faster, smoother, and with a noticeably better surface finish.
"Choose by the number to know the range, use touch to make the real choice"—this is another example of applying Sandpaper professional-grade standards