


 EN
 ไทย


Customers Also Purchased


When buying an Impact driver impact driver, what you might experience in the first week is driving screws for a while only for the bit tip to snap off inside the screw head, or the screw head stripping so badly that you can't drive it further or back it out. The impact driver is brand new, and the bits were bought at the same time. Why does this happen?
The real questions that follow might be: Is the impact driver too powerful for the job? Were the bits in the set low quality? Or is it simply because we don't know how to use it properly?
In practice, the tool is almost never the direct cause. What happens is that an impact driver delivers force in a very different way than a standard electric screwdriver. Any pre-existing weak points show up several times faster—whether it's bits not rated for impact use, bit sizes that don't match the screw head, or the angle at which the tool is held when applying force.
Impact Drivers Deliver Pulsed Force, Not Continuous Torque
The difference at the root of every bit and screw problem is the way an impact driver transfers power to the bit tip, which is unlike the electric screwdrivers, clutch screwdrivers, or cordless drills that many are familiar with. Broken bits and stripped screw heads aren't random accidents; they are the natural consequence of using the wrong type of accessories.
The internal hammer delivers rotational blows in pulses
Inside an impact driver, there is a hammer mechanism that rotates and strikes the drive anvil in rapid pulses. The resulting output is therefore a series of accumulated impacts, not a smooth and continuous torque. The advantage is high torque with minimal kickback to the wrist, but the drawback is that every impact stroke delivers a sudden shock wave all the way to the tip of the bit.
Metal fatigue from repetitive shocks
Materials subjected to thousands of repetitive shock cycles develop cumulative fatigue, even if each individual strike does not reach the point of immediate breakage.
Screwdriver bits designed for manual screwdrivers or standard drills can snap during seemingly light-duty tasks when used with an impact driver.
Bits used with impact drivers must be impact-rated
This is the number one cause of broken bits and the mistake users make most often, because both types of bits fit into the same chuck and look virtually identical at a glance.
The difference lies in the material composition and shank design—characteristics that are difficult to see with the naked eye but make a distinct difference in real-world use.
Impact bits can flex slightly
Bits made for impact drivers are engineered with tougher metallurgy. Some models feature a narrower torsion zone along the shank to flex and absorb shock instead of transferring all the force directly to the tip. This allows them to withstand far more impact blows before failing. Once they do reach that point, they often twist before breaking, giving a visible warning sign. Details on how to distinguish the two types of bits can be found in the article How to tell if a screwdriver bit is impact-rated
Extension bars and accessories must also be impact-rated
Extension bars, magnetic bit holders, and flexible shafts also come in standard and impact-rated versions. Using an impact bit with an impact driver but connecting it via a standard extension simply moves the weak point to the extension bar itself—which is even more prone to breaking than the bit due to its longer length.
Stripped screw heads are caused by bit cam-out, not high torque
Many people assume screw heads strip because the tool has too much power. In reality, screw heads deform because the bit slips out of the recess and repeatedly grinds against the drive walls—an issue entirely separate from the amount of torque being applied.
This happens extremely quickly with an impact driver, because every time the bit slips out, it gouges the drive walls once—and the tool impacts dozens of times per second.
Incorrect bit size for the screw head
Cross-head screw drives come in several systems that look similar enough to be mixed up inadvertently. Using a bit from the wrong system results in incomplete contact with the recess, leaving slight play that easily causes the bit to cam out under repeated impacts. Choosing the right drive standard and correct size is therefore much more critical than you might think.
Continuing to use worn-out bits
A worn bit tip rounds over, progressively reducing contact with the recess and camming out more easily each time it is used. A worn bit doesn't just slow down your work; it actively destroys screw heads.
Holding the impact driver misaligned with the screw
If the tool is tilted away from the screw axis, the applied force will not be aligned with the slot. The bit will be pushed sideways with every impact stroke. Holding the impact driver perpendicular to the work surface and checking it from two angles before driving is the easiest way to reduce this issue.
Insufficient Downward Pressure at the Start
At the start of driving, the bit must be pressed fully into the recess first. If pressed too lightly out of fear of damaging the workpiece, the bit will cam out on the first strike and strip the head. The correct method is to apply firm pressure at the beginning, then ease up once the screw begins to bite into the material.
Bit Length and Extensions Affect the Impact Driver
The greater the distance from the chuck to the bit tip, the higher the chance of the tip wobbling off-axis, leading right back to the bit camming out of the recess. This is why tight-space jobs requiring long extension bars more frequently run into stripped screw heads and broken shafts than standard jobs, even when using the same size screws and the same tool.
If it is truly unavoidable, use the shortest impact-rated extension bar possible for the job, and reduce the tool's power setting by one level to compensate for the increased wobble caused by the extra length.
Match the Impact Driver's Power Level to the Task
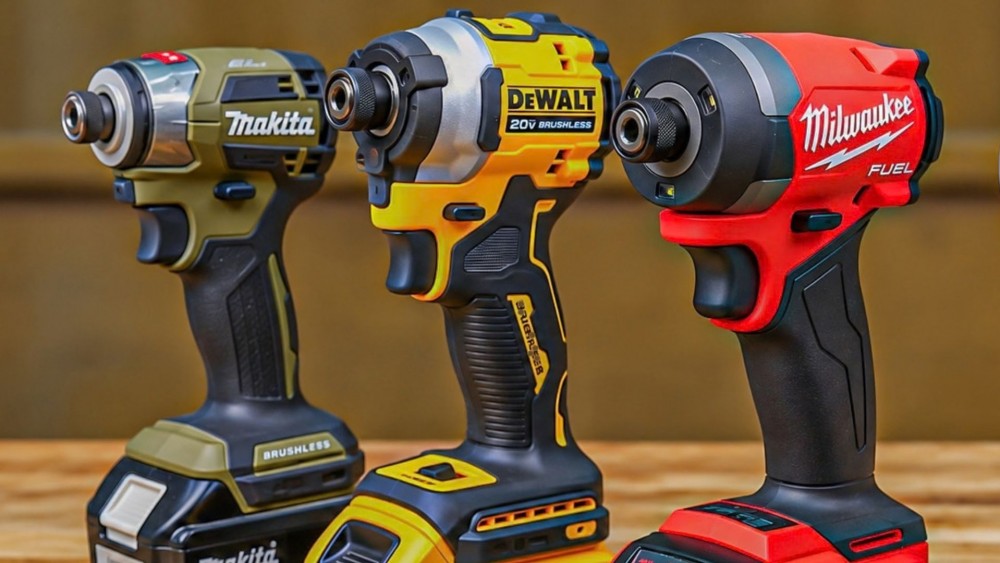
Most newer impact drivers offer multiple power settings, but many people leave them set to the highest level all the time, assuming it does no harm. This approach actually causes far more problems on small screws than on large ones.
The simple rule is to start using the impact driver at a low setting first, then increase it if it is not enough—not starting at maximum power and only reducing it after damage has already occurred.
Hinge screws, flat-pack furniture assembly screws, and small hardware installations should use the lowest setting that gets the job done. Excessive force will countersink the screw head deep into the material or strip the threads in the board before you can release the trigger.
These tasks require more continuous power and are better suited for medium to high settings. However, you should still pre-drill pilot holes in hardwood, as forcing a long screw into hardwood without pre-drilling puts the highest stress on the bit and causes it to break most often.
Tasks Where You Shouldn't Use an Impact Driver in the First Place
Not every job is suited for an impact driver, and knowing when to put the tool down and pick up something else will prevent far more damage than relying on guesswork.
The impact mechanism can tell you it's tight, but it cannot tell you how tight. Tasks with manufacturer-specified torque limits—such as assembling machine parts or work requiring specific torque ratings—must always be finished with a torque wrench.
Very small screws can handle little jarring force, and their shallow heads make bits cam out easily. These jobs are better suited for an electric screwdriver or a clutch-driven drill/driver, as explained in the article What Is the Difference Between an Impact Driver and a Drill Driver?
Tiles, acrylic sheets, and certain synthetic materials can crack from the sudden impact shocks before the screw is fully seated. For these materials, use a tool that delivers continuous torque with more precise speed control.
Signs You Should Stop Using the Impact Driver Before Causing Further Damage
Most fastening damage does not happen out of nowhere; there are always warning signs beforehand. The problem is that these signs occur within fractions of a second and are easily overlooked when rushing through a job.
- The impact sound changes rhythm or becomes abnormally loud during driving
- You feel the bit starting to slip or cam out of the recess
- The screw head shows circular gouge marks around the recess
- The screw stops sinking even though the tool is still impacting
- The bit gets extremely hot to the touch shortly after use
Release the impact driver trigger and check first whether the bit is still fully seated in the recess and if it is already worn. Forcing it to continue driving when the bit is already lifting is what turns a screw that could still be backed out into one that requires a screw extractor.
Conclusion
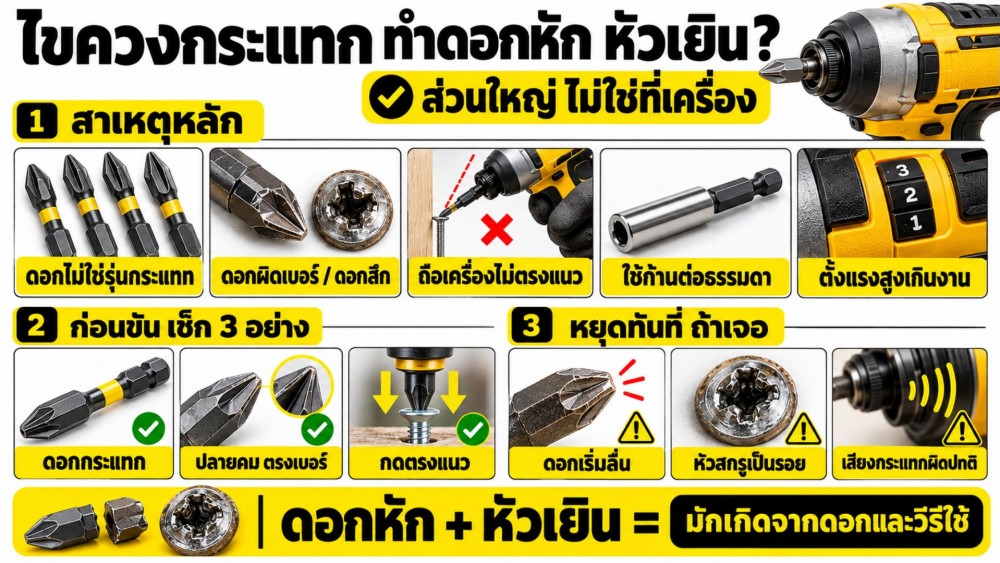
Broken bits and stripped screw heads from an impact driver almost never result from the tool being too powerful. Instead, they come from using bits not designed for impact forces, using the wrong bit size or a worn bit, and failing to hold the tool straight or apply enough downforce at the start.
Before getting started, you should check three main things: whether the bit is an impact-rated model, whether the bit tip is still sharp and the correct size, and whether the extension bit holder used is also impact-rated.
Checking takes less than a minute, but it eliminates almost all the hassles of wasting time extracting stripped screws from Impact driver almost entirely.