


 EN
 ไทย


Customers Also Purchased


Replacing Light Switches or wiring a 1-way light switch is a basic electrical task that many people want to do themselves because it seems simple—just remove the old switch and wire in the new one. But once the switch plate is actually removed, many immediately lose confidence seeing multiple wires inside, unsure which is the L wire, which is the N wire, and which terminals they should be connected to correctly.
A common problem is that some homes do not use standard wire colors. Some spots have undergone prior repairs or extensions, meaning wire color cannot always be trusted. Especially in older homes, commercial buildings, or older electrical installations, guessing wires purely by color can easily lead to incorrect wiring.
This article will walk you through the fundamentals: what a 1-way light switch is, what L and N wires are, how to identify wires before wiring, the correct principles for wiring a 1-way switch, common mistakes beginners make, and when you should call an electrician instead of DIY-ing. That way, reading this article won't just help you get the light to work, but will also give you a deeper understanding of home electrical safety principles.
Important Note: Electrical work carries risks. If you are unsure, do not know the wire locations, or do not have electrical testing tools, it should be carried out by a qualified electrician. Incorrect wiring can cause electric shocks, short circuits, equipment damage, or fires.
What is a 1-way light switch?
A 1-way light switch is a switch used to control lighting on/off from a single point. It is the most common type of switch found in typical homes, such as bedroom switches, bathroom switches, front porch switches, balcony switches, or storage room switches.
The working principle of a 1-way light switch is not very complex. When turned on, the switch closes the electrical circuit, allowing current to flow to the light bulb. When turned off, the switch opens the circuit, turning off the light.
However, a common misconception is that a light switch can be connected to any wire as long as the light turns on and off. In reality, proper switch wiring must have the switch "break and connect the L wire" (the live wire). It should not switch the N wire, as this can leave the light bulb or socket energized even when the switch is turned off.
Simply put, a 1-way light switch is not just responsible for turning the light on or off; it must also interrupt the circuit at a safe position.
Before wiring a light switch, you must understand L, N, and Ground wires
Before wiring or replacing a light switch yourself, the most important thing is to understand the function of each type of wire. Each wire has a different purpose and should never be interchanged based on guesswork.
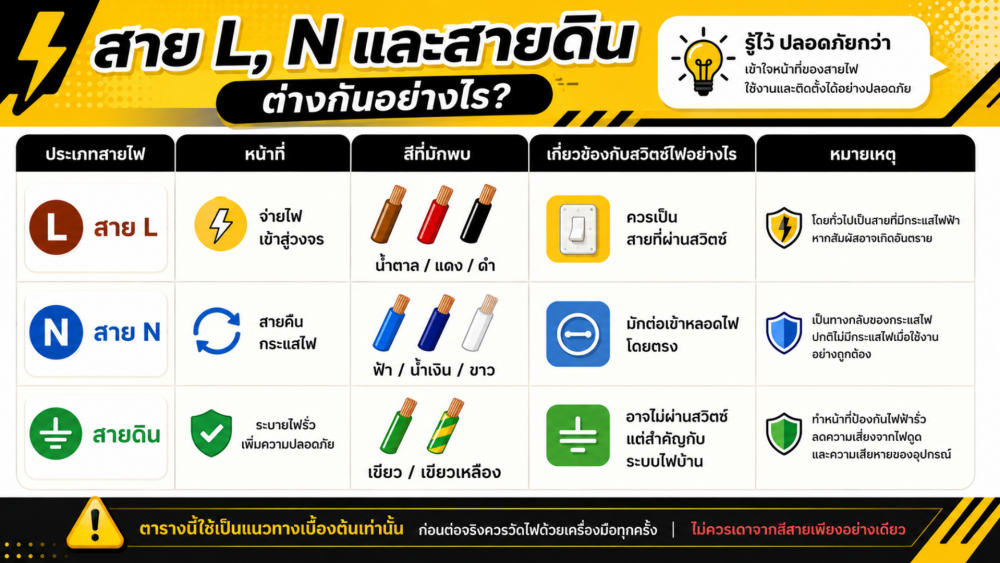
Generally, home electrical systems have 3 main types of wires you should know: the L wire, the N wire, and the ground wire.
What is the L wire?
The L or Line wire is the live wire carrying current. It supplies power to the circuit. Many people may refer to it as the "incoming power wire" or "live wire."
The L wire is the wire that the switch should break and connect. When the switch is turned off, no power will be supplied to the circuit behind the switch leading to the light bulb, making it safer when replacing bulbs or repairing equipment later on.
Common colors for the L wire include:
- Brown
- Red
- Black
However, you should not rely 100% on wire colors, as in some homes the wire colors may not follow standards, especially in older houses or properties that have undergone multiple renovations.
What is the N wire?
The N or Neutral wire serves as the return path for electrical current to complete the circuit. Generally, the N wire connects directly to the light bulb or electrical appliance and should not pass through the switch instead of the L wire.
Common colors for the N wire include:
- Light Blue
- Blue
- White
If the switch is wired to cut the N wire instead of the L wire, the light may still turn on and off normally, but the bulb socket may still be energized. This is very dangerous because users may assume it is safe simply because the switch is turned off, even though power is still present at certain points.
What is the ground wire?
The ground or earth wire helps divert leakage current into the ground, reducing the risk of electric shock and enhancing overall electrical system safety, especially for electrical equipment with metal frames or areas susceptible to current leaks.
The commonly found ground wire color is
- Green
- Green with yellow stripe
For general light switches, some locations may not use a ground wire directly. However, a good home electrical system should include a grounding system and residual current devices (RCDs), especially in homes with multiple appliances or damp areas such as bathrooms, kitchens, and outdoors.
How to identify L and N wires before wiring a light switch
A common mistake beginners make is assuming that the red wire is always L or the blue wire is always N. In actual electrical work, you should never guess like that because wire colors can vary depending on the age of the house, the standards in effect at the time, or the work of the previous installer.
To identify L and N wires, you should use test tools such as a test pen screwdriver, a non-contact voltage tester, or a multimeter.
Can a test pen screwdriver be used to identify the L wire?
A test pen screwdriver can be used for initial testing to see which wire is live. Generally, if the indicator light on the screwdriver lights up when touched, that wire is likely the L wire.
However, you must understand that a test pen screwdriver is only an initial check tool and is not as accurate as a multimeter. Using it requires extreme caution because it must be tested while the power is on. If beginners are not confident, they should not attempt it themselves.
Precautions when using a test pen screwdriver include:
- Hold only the insulated parts.
- Do not touch the metal parts of the screwdriver.
- Do not test in wet areas or with wet hands.
- Do not use a damaged test pen screwdriver.
- If unsure, stop and call an electrician.
Is using a multimeter more accurate for identifying L and N wires?
A multimeter is a tool that measures electrical voltage more accurately than a test pen screwdriver. Electricians often use it to check the voltage between the L wire and the N wire, or the L wire and the ground wire, to confirm which point is truly live.
For general users without knowledge of how to use a multimeter, do not attempt to measure at random. If the wrong measurement range is set, the probes are held incorrectly, or the wrong wires are touched, an electric shock could occur or the tool could be damaged.
Simply put, if you are not sure which wire is L and N from the start, that is a sign you should have an electrician check it first; do not force yourself to wire it.
Principles of properly wiring a 1-way light switch
The basic principle of wiring a 1-way light switch is to run the L wire through the switch and then to the light fixture, while the N wire connects directly to the light fixture.
Put simply, the switch acts like an open/close gate for the L wire. When turned on, current flows to the light fixture; when turned off, the current is cut off before reaching the light fixture.
Here is an overview of the wiring:
| Connection point | General wiring |
| L wire from circuit breaker | Enters switch terminal |
| Wire output from switch | Goes to light fixture |
| N wire | Connects directly to the light fixture |
| Ground wire | Connects to the grounding system at the designated points |
The crucial rule to remember is that the switch must disconnect the L wire, not the N wire.
Easy-to-understand steps for wiring a 1-way light switch
This section provides informational explanations to help you understand the overall workflow. It does not mean everyone should do it themselves; if you are not confident about electrical systems, it is safer to hire a qualified electrician.
1. Turn off the circuit breaker before starting work
Always switch off the circuit breaker before removing the switch or touching any wires. Do not rely solely on turning off the light switch, as live current may still be present inside the circuit in some cases.
If you are unsure which breaker controls that circuit, shut off the main breaker of the house for greater safety.
Never perform electrical work with wet hands, standing on a wet floor, or in a high-humidity area, as this significantly increases the risk of electric shock.
2. Verify that there is truly no power
After turning off the circuit breaker, always double-check with a voltage tester before touching the wires, as some homes may have separate circuits or backfed power from another point.
A simple rule: never rely solely on turning off the switch or breaker; always double-check.
3. Remove the faceplate and old switch
Carefully remove the switch faceplate using a screwdriver, then observe the original wire positions before disconnecting.
If you are replacing an old switch with a new one, take a photo of the original wire positions first to help remember which wire connects to which terminal. Even so, you must still verify that the original wiring was correct, as it may have been wired incorrectly from the start.
4. Inspect the condition of the wires
Before wiring the new switch, check whether the wires are in good condition, such as:
- Is the wire insulation brittle or cracked?
- Is the copper blackened or burned?
- Are there melt marks on the old switch?
- Are the wires loose or easily detached?
- Is there a burning smell around the switch box?
If you find burn marks, brittle insulation, or very old wires, do not proceed with wiring immediately. Have an electrician inspect them, as there could be issues with heat buildup or loose connections.
5. Connect the L wire to the switch terminal
Generally, the L wire connects to the switch's line input terminal, while the other terminal connects to the wire going out to the light fixture. When the switch is turned on, the circuit closes, turning the light on.
Terminal positions vary across different switch models. Some feature markings like L, COM, IN, OUT, or have a wiring diagram on the device itself. Therefore, read the markings on the switch or the manual for that specific model before wiring.
Do not assume that all switches are wired the same way, as terminal designs may differ depending on the brand and model.
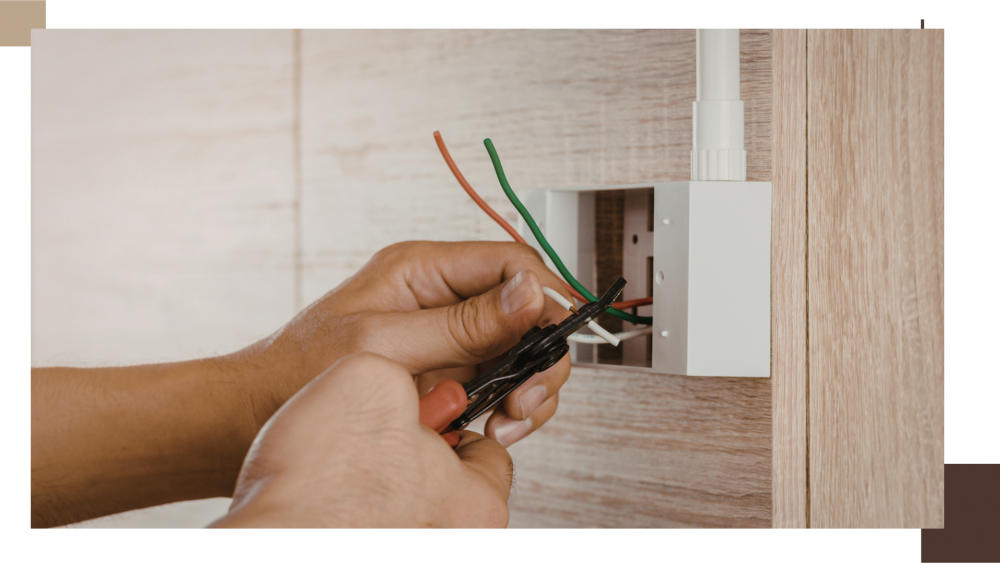
6. Tighten the wires properly
Wire connections must be tight, not loose, and without excessive exposed copper. Loose wires can cause heat buildup, resulting in an overheated switch, melted faceplate, or electrical sparks.
However, do not overtighten to the point of breaking the wire or damaging the switch terminals. Tighten it appropriately and give it a gentle tug to ensure the wire does not slip out of the terminal.
7. Arrange the wires neatly before reassembling
Before pushing the switch back into the box, arrange the wires neatly without excessive bending or kinking, and ensure that exposed copper parts do not touch other terminals or the metal box.
If the switch box is very cramped, contains multiple wires, or is difficult to push back, do not force it in, as this may cause wires to loosen from the terminals or result in misplaced contact points.
8. Turn on the circuit breaker and test operation
After completing the assembly, turn on the circuit breaker and test turning the switch on and off to see if the light works properly.
Things to observe after turning it on include:
- Does the light turn on normally?
- Does the light turn off completely?
- Is there a buzzing sound from the switch?
- Are there any sparks or a burning smell?
- Is the switch plate unusually hot?
If there are any abnormalities, turn off the breaker immediately and have an electrician inspect it.
Common mistakes when wiring a light switch
Wiring a light switch may seem simple, but there are several points where beginners often make mistakes—especially when thinking that "as long as the light turns on, it's fine," even though electrical safety is not determined merely by whether the light works.
1. Connecting the switch to interrupt the N wire instead of the L wire
This is a critical mistake because even though the light can be switched on and off, the lamp socket may still carry live current, posing an electric shock hazard when replacing bulbs or repairing fixtures.
The key rule to remember is: the switch should interrupt the L wire only.
2. Wiring based solely on wire colors right away
Wire colors offer an initial clue, but they are not always definitive proof because some houses are wired with non-standard colors, or were previously repaired using whatever colored wires were available on-site.
Therefore, before making the actual connection, you should always verify with tools rather than relying on wire colors alone.
3. Loose wire connections
Loose wires are a major cause of heat buildup in light switches. Sometimes everything seems normal at first, but over time, a buzzing noise, burning smell, hot switch, or melted faceplate may occur.
4. Stripping the wire too long
If the wire is stripped too long, the exposed copper may protrude from the switch terminal and risk touching other wires or a metal box, leading to a short circuit.
Always strip the wire to the proper length required by the switch terminal.
5. Using non-standard or substandard switches
Light switches are used every day. If you choose a low-quality product with poor internal contacts or an inadequate current rating for the load, it can cause heat buildup, poor durability, or long-term safety hazards.
Choose certified standard switches that match the electrical load and are suitable for the installation location, such as indoors, outdoors, or in damp areas.
6. Not turning off the breaker before working
Some people think that just changing a switch takes very little time, so they don't turn off the breaker or only flip the wall switch off—a very risky practice.
Electrical work should always begin with cutting the power, verifying that no current is present, and only then starting the work.
Can I wire a light switch myself?
Replacing a basic 1-way light switch might be a DIY task for some, provided they have the proper knowledge, understand the electrical system, possess voltage testing tools, and know how to safely shut off the power.
However, that doesn't mean everyone should do it themselves. Electrical systems vary from home to home; some have clearly organized wiring, while others may feature multiple spliced connections, inconsistent wire colors, or pre-existing electrical issues.
You should call an electrician in the following cases:
- You don't know which wire is L and which is N
- You don't have voltage testing tools
- The house is very old or the wiring system is unclear
- You find brittle, cracked, or burnt wires
- The switch felt hot or had a burning smell previously
- Circuit breaker trips frequently
- Multiple switches are inside the same box
- It is an outdoor circuit or located in a damp/wet area
- New wiring is required or the entire point's electrical system needs rewiring
A simple rule of thumb: if it is just replacing an existing device in a clearly defined system, it may be doable for knowledgeable individuals. But if you have to "guess the wires" or "modify the system", it is much safer to hire an electrician.
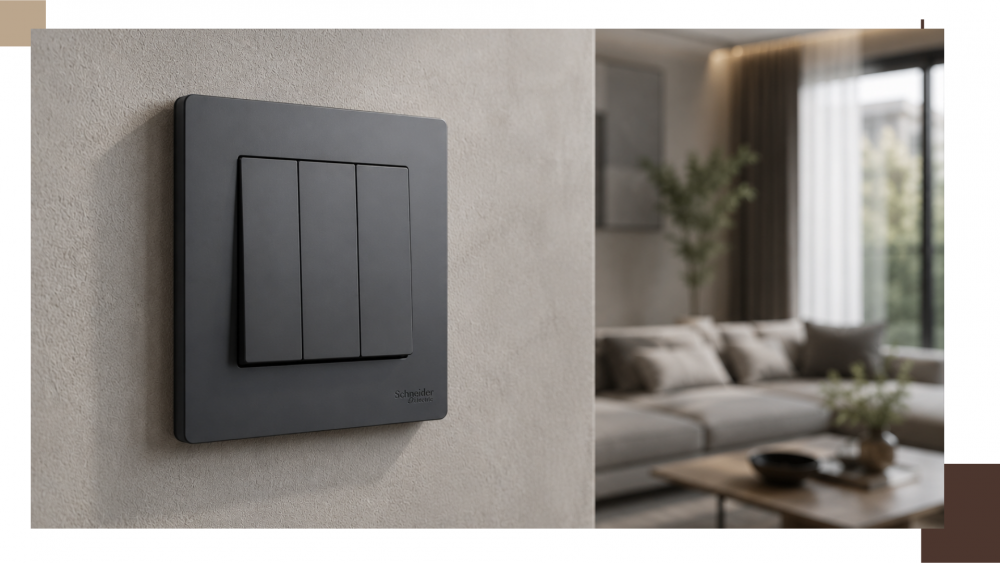
Which light switch should you choose?
Besides correct wiring, choosing the right light switch is also important because switches are frequently used. Choosing an unsuitable one may result in poor durability or future issues.
Things to consider when buying a light switch include:
- Choose certified standard-compliant switches
- Check the supported current and voltage ratings
- Select a model suitable for indoor or outdoor use
- If used in damp areas, choose a model with a waterproof cover or one suited for that environment
- Select durable materials that do not easily become brittle
- Terminals should be tight and easy to use
For general household lighting, do not choose switches based on price alone, as high-quality switches help reduce loose contacts, heat buildup, and short lifespans.
Wiring a 1-way light switch always requires understanding the L and N wires first
Wiring a Light Switches 1-way switch may seem like a simple job, but safety is not just about "whether the light turns on". What is more crucial is wiring it properly—especially ensuring that the switch disconnects the L wire, not the N wire.
Before starting, understand the functions of the L wire, N wire, and ground wire. Verify the wires with appropriate tools, turn off the breaker every time before working, and inspect the condition of the wiring and existing devices for burns or deterioration.
If it is a switch replacement in a clearly defined system and the person doing it possesses electrical knowledge, it may be done by yourself with caution. However, if you are unsure which wire is which or if the electrical system seems complicated, having an electrician inspect it will be safer. Because good electrical work is not just about making the light turn on, but also ensuring it can be used safely in the long run.