


 EN
 ไทย


Customers Also Purchased


Why Air Pumps ...turning on more frequently than usual? Why is the pressure gauge rising so slowly when the air compressor used to fill the tank in no time? And why, when you properly closed the valve after work, has the pressure dropped by half a tank by morning? What's really going on?
The most common answer is a "leak". But most air compressor leaks occur at tiny spots like fittings or valves that we never think to look at. Some leak by "seeping"—meaning there's no loud hissing, but air keeps escaping continuously, like a faucet dripping all day. In the end, it results in a mysteriously higher electricity bill. Even worse, the air compressor has to cycle on more often to compensate for the pressure, sometimes causing downstream pneumatic tools to underperform as well.
That's why in this article, we'll walk through troubleshooting air compressor leaks with simple "DIY" methods and basic tools—no need to call a technician. We'll also cover where to start and how to troubleshoot systematically so you don't go in circles, waste time, or accidentally disassemble parts you shouldn't, allowing you to figure things out quickly, fix the exact issue, and avoid risky trial and error.
What to prepare and watch out for before checking for air compressor leaks?
Let me address safety first, because "compressed air" from a compressor isn't as gentle as many think. Air pressurized to 6–10 bar, if released in the wrong place, can send objects flying or fling debris straight into your eyes. Here's all the basic gear you'll need to prepare:
- Water mixed with dish soap or liquid soap (preferably in a spray bottle)
- A brush / paintbrush or sponge (if you don't have a spray bottle)
- A clean rag
- A wrench / adjustable wrench / open-end wrench that fits the fittings
- Thread seal tape (PTFE) or threadlocker / thread sealant (depending on the system)
- Flashlight
Precautions before checking an air compressor
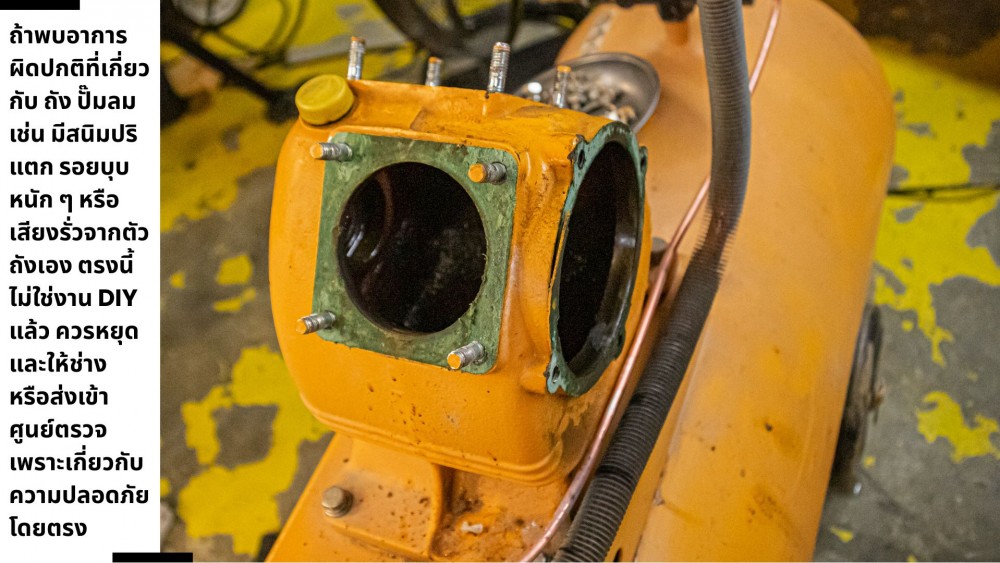
Always "relieve the pressure" from the system before tightening or disassembling any part. Turn off the power switch or disconnect the power, then slowly bleed the air at the drain point or run an air tool until the pressure drops. Never tighten or loosen parts blindly without knowing what kind of valve it is; some are safety valves or check valves, and turning the wrong part could cause the air compressor system to malfunction.
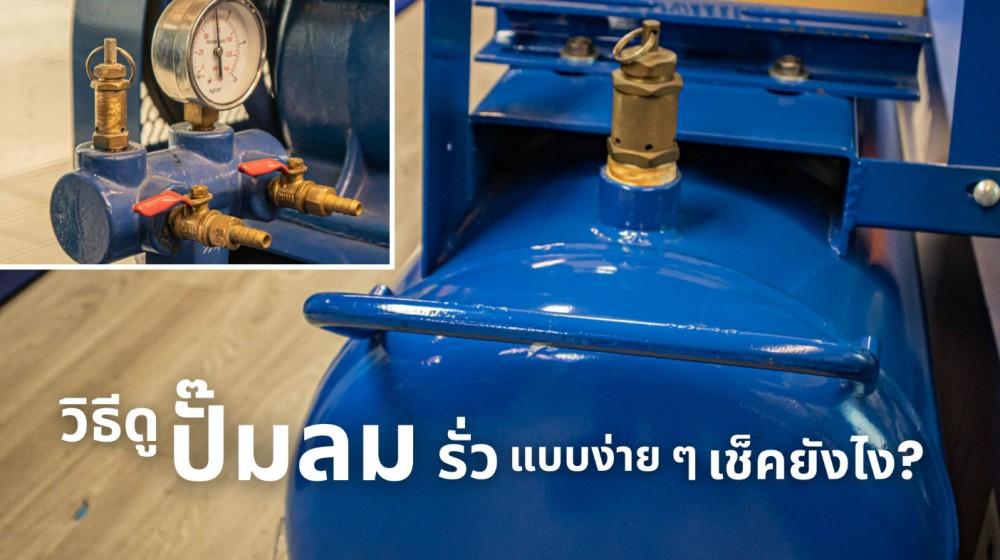
The fastest way to check for air compressor leaks: look at the "pressure" first
What is the difference between a large and small air compressor tank besides storage capacity? Whether the tank is large or small, the fastest and most informative way to start is by checking for pressure drop. This tells you "is there actually a leak?" before you waste time pinpointing the exact spot.
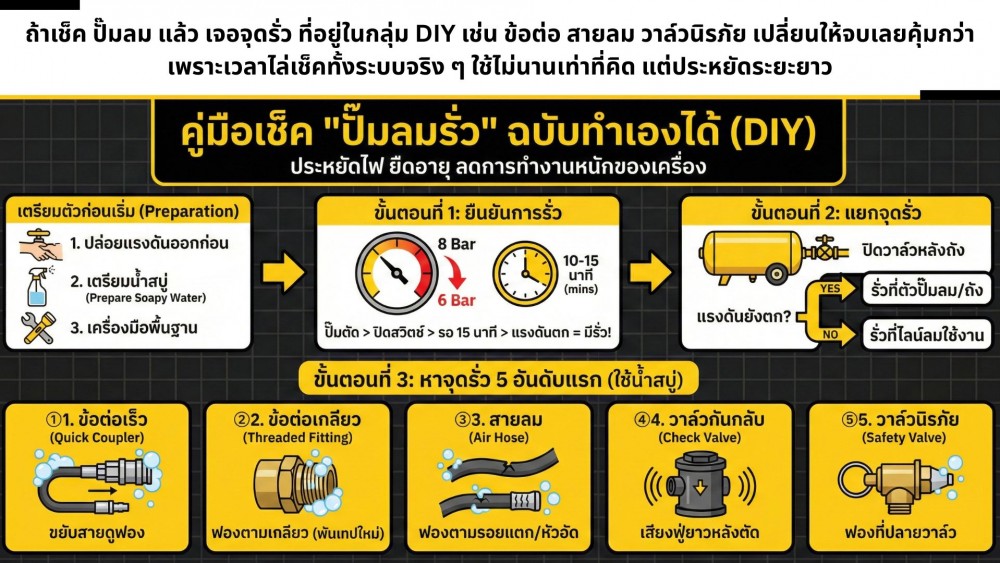
Wait for the tank to fill completely until it reaches the normal cut-out pressure (e.g., 8 bar) and the compressor stops on its own. Then turn off the switch or cut the power to ensure the compressor won't kick in to compensate. Record the initial gauge reading (e.g., 8 bar), wait 10–15 minutes, and see how much pressure remains.
If the pressure barely drops, it means the overall system is still fine or leaks so little that it hardly has any impact. But if there is a noticeable drop, such as from 8 to 6 within 10 minutes, then it is fairly certain that the air compressor “has a leak” and you need to track down the spot.
A little trick that helps make it clearer is to “isolate the usage line from the tank.” If the air compressor has a ball valve after the tank before feeding into the line, try closing that valve and test the pressure drop again. If it stops dropping after closing it, the leak is on the airline side. But if it still drops after closing, the leak is on the air compressor side itself. This is a simple “system isolation” method that significantly narrows down your search area.
Soapy Water is the Secret Helper: Where There Are Bubbles, There Is a Leak
I can tell you that the most classic and still the most effective method is “soapy water,” because leaking air creates clearly visible bubbles—even with a tiny leak on the air compressor, bubbles will still form. We recommend mixing liquid soap with water at a ratio of about 1:3 or 1:4 and shaking it well. A spray bottle makes application very easy; if you don't have one, dipping and applying it with a brush works just as well.
Points to Check First (Starting from Most Common Leaks)
Start with spots that are “frequently moved/plugged in and out” first, because from my experience, these spots leak the most easily. Begin with quick couplers that get connected and disconnected all day, followed by threaded fittings connecting the air hose from the tank, then manifold fittings / tees / brass fittings with multiple layers of connections. The more joints there are, the higher the chance of air compressor seepage.
Don't forget the air filter / regulator / FRL unit, as they contain both O-rings and covers that can easily leak if not tightened completely or if the seals start hardening. Finally, check the fittings connecting to pneumatic tools. To be sure, spray or apply soapy water generously and slowly watch for bubbles. If you see bubbles continuously popping and not stopping, that's definitely a leak, giving you an exact “coordinate” to fix immediately.
Don't Forget the “Commonly Overlooked Spots”
Often we think the “hissing sound” comes from the air compressor tank, but sometimes it comes from small spots where we rarely shine a flashlight. For example, the base of the pressure gauge with its small threads is a classic culprit—leaking just slightly but draining air all day long. Other spots include underneath the pressure switch (which on some models has small tubing), safety valves that might have trapped dust or oil residue preventing a tight seal, and the vent port of the unloader valve—which should normally hiss only briefly when cycling off, but if it hisses continuously or bubbles constantly, that is “not normal.”
Top Air Compressor Leak Points and How to Check Without Disassembling
Here, try thinking like you are “hunting for leaks in a pipe.” Air compressors usually leak from very small spots, like 3 Air Compressor Spare Parts That Should Be Checked Regularly yet these happen very frequently, especially on parts we plug in and out or points subjected to continuous vibration. If we start checking these popular leak spots first, we will find them much faster than wandering around the whole system. Most importantly, there's no need to rush into taking apart the pump head or tank—just soapy water and a flashlight are enough to track them down.
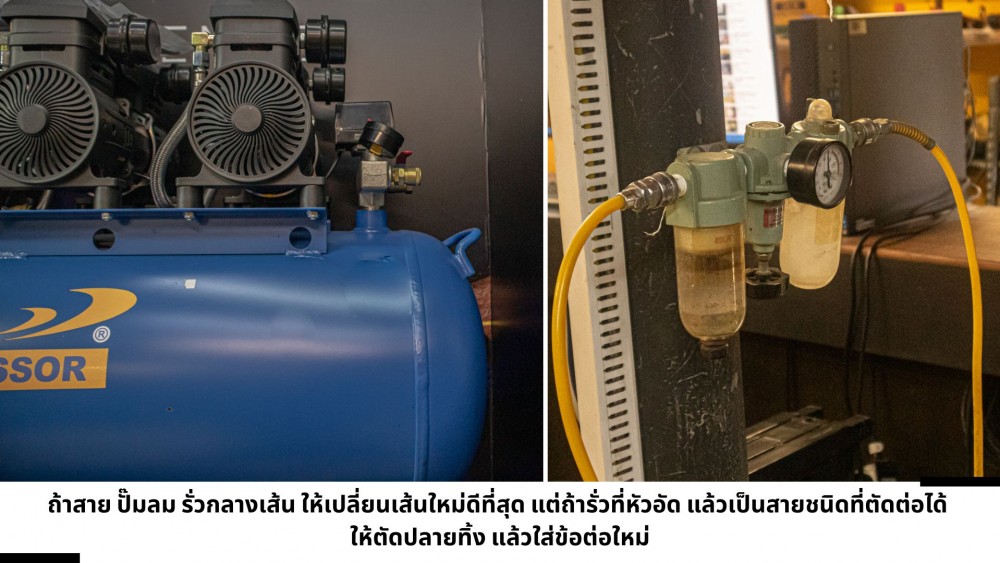
1. Quick Couplers: Frequent plugging causes seal wear
If you use your air compressor every day, couplers are the most frequently used components. The internal O-rings will wear, harden, or swell from oil and dirt. When the plug is inserted and doesn't fit tightly, it creates a constant slight leak.
A simple way to check is to spray soapy water all around the coupler body and “wiggle the hose gently.” Sometimes it doesn't leak when stationary, but wiggling it slightly causes bubbles to appear, meaning the plug is loose or the seal is starting to deteriorate.
The solution is to try replacing the plug first. If it still leaks, replace the entire coupler or repair the O-ring if it is removable.
2. Threaded Fittings: Incorrect tape wrapping—tight yet leaking
Threaded fittings are another air compressor part that leaks very often, especially when adding extra connections on-site and wrapping PTFE tape in reverse, too little, or too much, preventing the threads from seating properly. Checking is easy: use soapy water and watch for lines of bubbles along the threads. The DIY fix is to release all pressure, loosen the fitting with a wrench, wipe off the old tape residue thoroughly, and wrap new tape “in the direction of tightening,” pulling it snug for about 6–10 turns, then tighten it back down securely.
3. Cracked or Swollen Air Hose: Leaks silently but wastes a lot of air
Certain types of air hoses will harden, develop hairline cracks, or swell at crimped ends when exposed to heat, oil, or strong sunlight, causing leaks that are virtually silent yet drain pressure quickly. To check, spray soapy water along the length of the hose—especially where it bends, kinks, or experiences friction—and listen closely for subtle sounds.
4. Check Valve: The Culprit Behind "Backflow" Causing Frequent Air Compressor Cycling
The check valve's function is to prevent air in the tank from flowing back to the pump head. If it leaks, you will experience strange symptoms, such as a hissing sound near the pump head/copper tube for a while after the compressor shuts off, or a drop in pressure even though the line valve is closed.
A simple way to check without deep disassembly is to let the tank fill completely, cut off the power, and listen at the discharge tube going from the pump head to the tank. If there is an abnormally persistent hissing sound, it means the check valve might be leaking or the unloader valve isn't releasing properly.
Sometimes rust debris gets stuck in the valve, preventing it from sealing completely. Cleaning it out can help, but if the spring or valve disc surface is worn, replacing it with a new valve is better.
5. Safety Valve (Pop-off Valve): A Small Point That Lets the Air Compressor Run Wastefully
Safety Valve: A Small but Essential Air Compressor Spare Part—What Does It Actually Protect? Sometimes a safety valve isn't severely damaged; it just has dust or oil deposits accumulated on it, preventing the pin and spring from sealing properly, which causes air to constantly "seep" out.
Spray soapy water around the tip of the valve; if bubbles keep forming, it's leaking. On some models, you can briefly pull the release ring to let it snap back onto its seat for a tighter seal. However, if it still leaks, replacing it with a new safety valve is better. Never attempt to modify the spring tension yourself.
Checking Air Compressor Leaks "By Air" Without Soapy Water
At some job sites, soapy water may not be convenient or wet conditions may not be permitted. If that's the case, there are still very simple, down-to-earth alternative methods that require virtually no extra equipment, such as:
- Listening with Technique Don't listen from a distance. Go close and listen zone by zone, cupping your hand behind your ear like a cone to help pinpoint the direction of the sound better.
- Using the Back of Your Hand to "Feel for Airflow" The back of your hand is more sensitive to air currents than your palm. Try slowly passing it along the joints; you will feel a chill or air hitting your skin if there's a leak. Be careful, however, not to do this near hot components or rotating fans.
- Using Tissue Paper or Thin Scrap Paper Hold the paper close to suspected leak points. If there's an air leak, it will flutter visibly. This method is great for checking narrow crevices around the air compressor or checking small valve tips.
Key Question: "Can I Just Leave a Small Air Compressor Leak Alone?"
To answer bluntly whether it's usable: yes, it can be used, but you will be paying higher electricity bills and forcing the air compressor to work harder just to "compress wasted air." The motor or pump head will cycle on more frequently than necessary, which will ultimately turn into a major problem when the machine overheats, trips frequently, wears out seals, and leads to costlier repairs.
Summary: Checking Air Compressor Leaks Begins with Isolating the System, Monitoring Pressure, and Using Soapy Water
If you want to find leak points on your air compressor without relying on a technician, start with an "overall check" to confirm whether it is actually leaking. Then, isolate the system to determine which direction to troubleshoot. Next, use a foolproof method like soapy water on the most common problem spots before moving on to specialized areas of the air compressor.
By following these steps, you won't have to guess blindly, and you will locate the leaks on your Air Pumps easily on your own, while also achieving a more stable air system, consistent pneumatic tool operation, and ultimately saving both time and costs.


